What's New I Sitemap I Bibliography I Vortigern Studies l POLLS I LINKS l Games I Sitemaster |
What's New I Sitemap I Bibliography I Vortigern Studies l POLLS I LINKS l Games I Sitemaster |
| Vortigern Studies > Fectio > Articles > How to.. make a plumbata |
Fectio Index
|
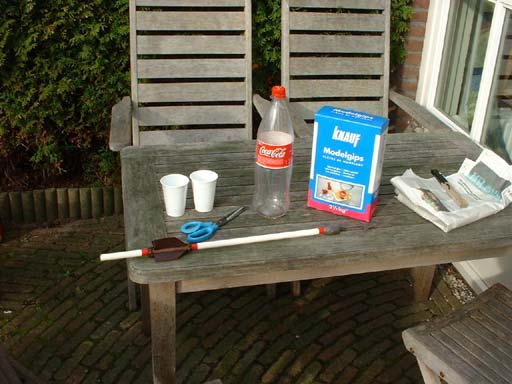
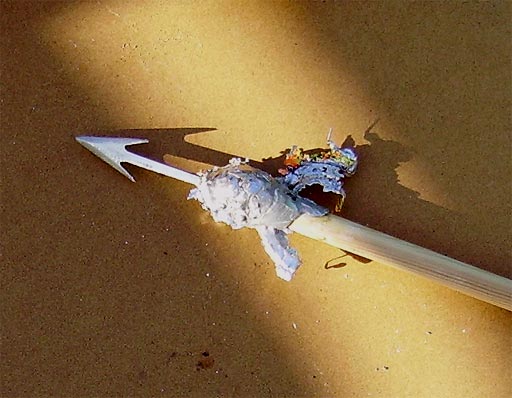
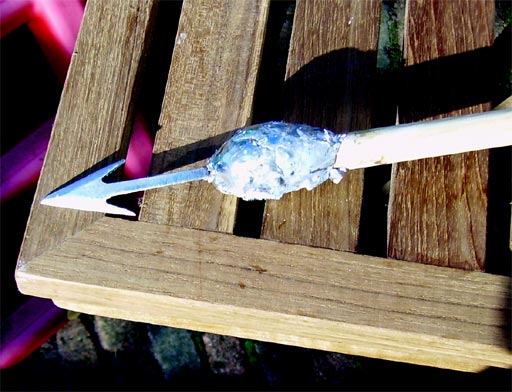
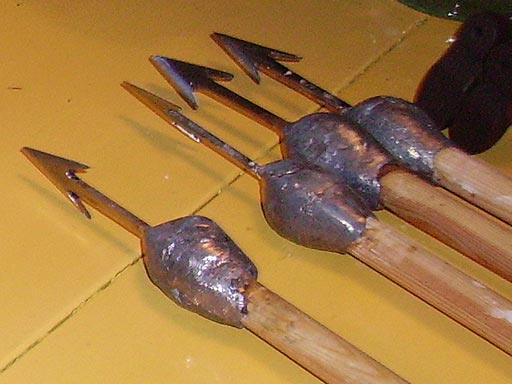
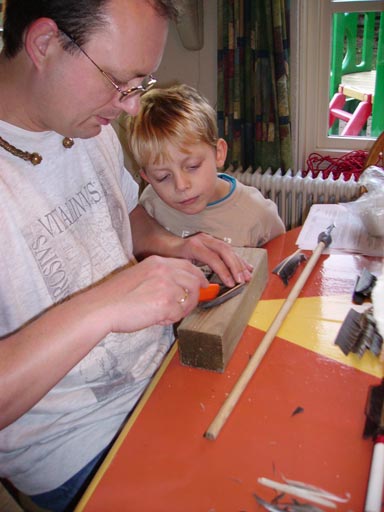
This page is about making a basic item, the Late Roman throwing dart or plumbata. Plumbatae were the basic throwing weapons of the Late Roman infantryman, from the 4th century until at least the 7th. Each soldier may have caried up to five of them in his shield, and more in a quiver. This is a guide how to make them.
The
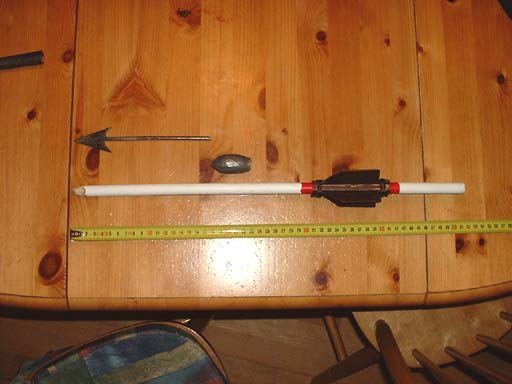
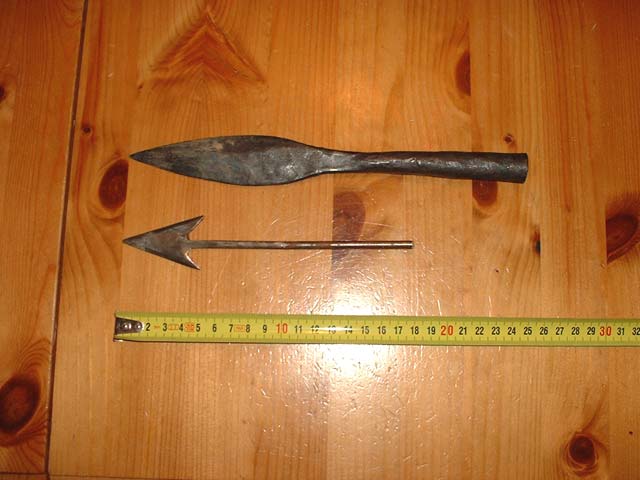
Plumbata
The
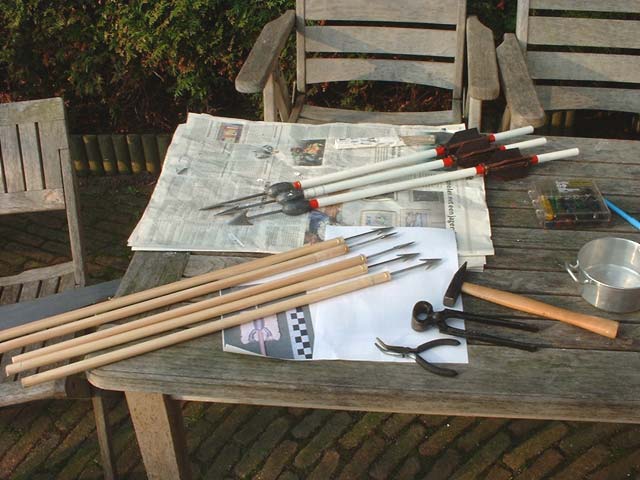
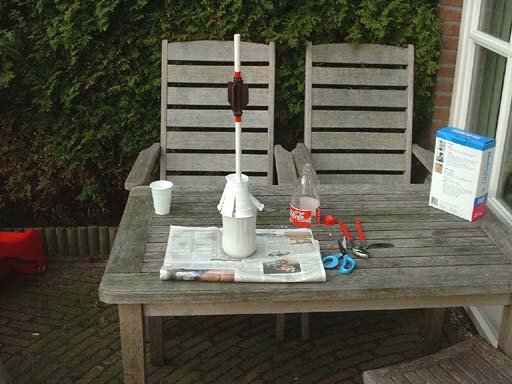
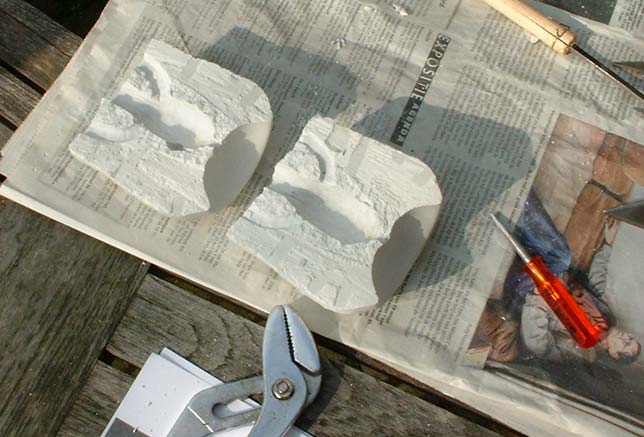
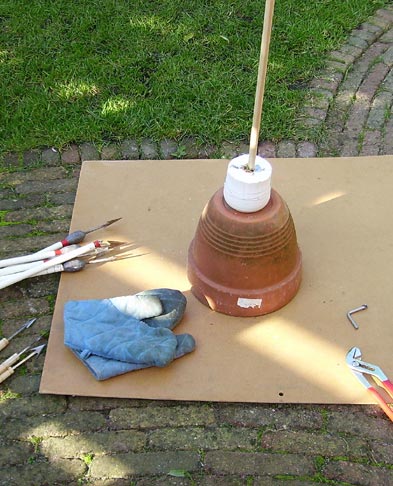
Cast The images below will give you an idea:
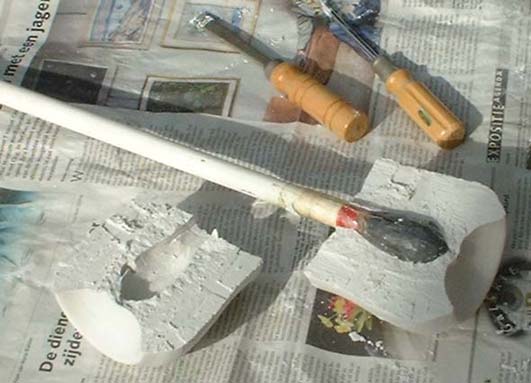
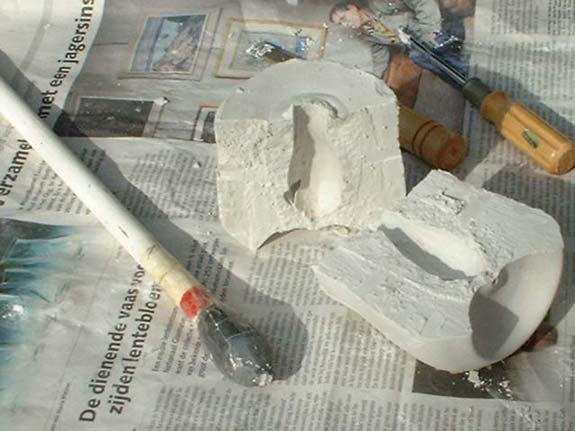
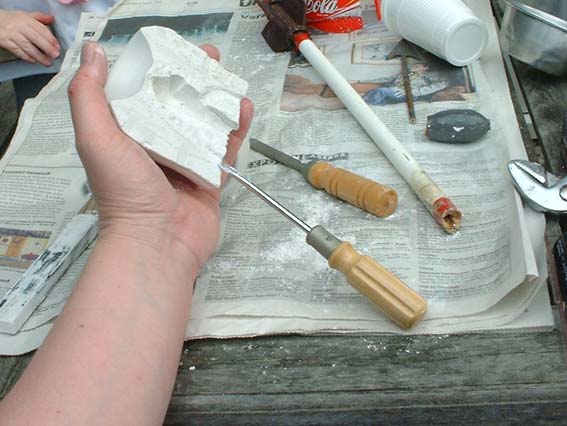
Gently chisel the plaster away to make two channels, but be careful to do each half in the same spot, otherwise when you put both halves together the channel is not properly placed.
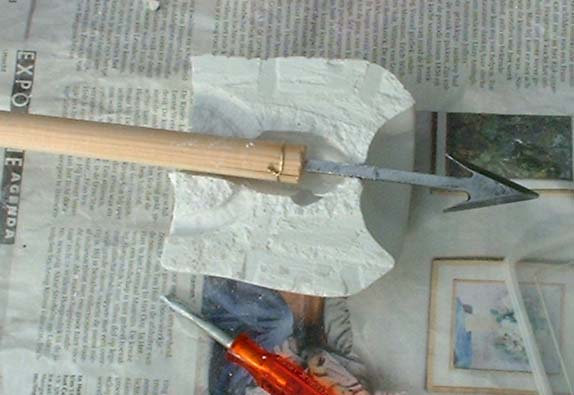
Now
try and seal both halves again with the plumbata you made
earlier inside it. At this time you can still adjust it,
or seal the sides with clay if you've been
overenthusiastic with your chisel! Especially the hole in
front should leave only room for the metal head,
otherwise the lead will run through it. The cast is now
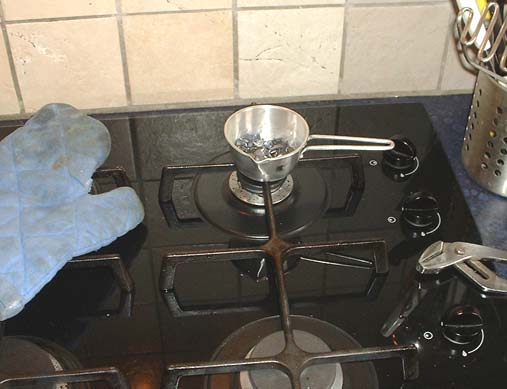
ready. The Lead This is something to be really careful about. Lead is a vicious metal, brutal when hot, toxic even when solid, and there's always a danger of toxic fumes when it's heated. So, no matter what you do, when you heat lead to melt it, always do it outside or in a well-ventilated environment. Never let your kids get within 5 meters of the melting spot. You should have a bucket of water nearby should you need cooling or extinguishing something. And, always use a wrench to hold the pan or whatever you use for melting the lead in.
The best lead for the job is new lead, to be bought in your DIY shop; old lead will give off those toxic fumes, new lead probably won't (it didn't in my case). The amount of lead you need depends on the size of your weight. I use 250-300 grams of lead, but that includes the overflow and excess lead (see below). My plumbatae are probably at bit on the heavy side when compared to the originals, so using less would probably be better. Cut the lead into small pieces into the pan you're going to use. I use a pan of my daughter's old kid's cooking set - nice and small, and from aluminium which heats up well. Now heat the lot and watch it all the time until it starts melting. You may stir a bit but take care! After some time the lead flakes will turn into a silvery fluid (which looks a bit like mercury). If you re-use older lead, some stuff won't melt, but float on top of the fluid mass. It won't be poored, best throw it away and clean the pan after each pooring.
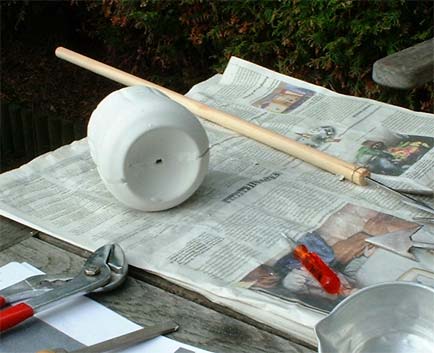
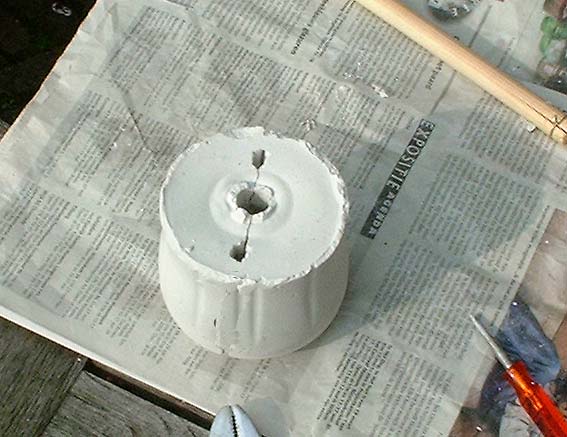
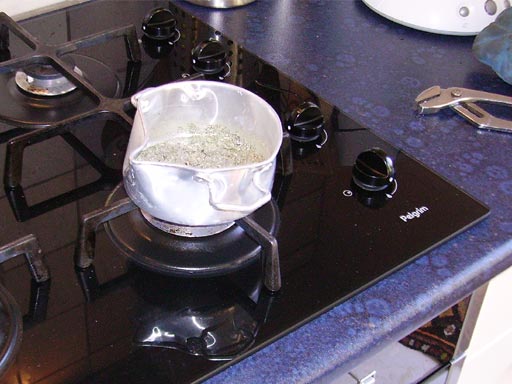
When all flakes are gone, it's time to pour. So where do you do that? The cast should be very stable, and you'd best have something underneath to catch any of the spilt lead. I use a big piece of smooth hardboard, where all spilt lead is easily (and cleanly) recovered for future attempts. I place the cast on top of a big, upturned, plant pot, with a stone underneath to support the plumbata should it move inside the cast. Now pour
the molten lead quickly into the cast. If all goes well
and you've prepared the cast right, when you pour into
one hole there should be lead coming out of the second
when the cast is filled up. Now let the lead harden,
which will happen very quickly (about 20 seconds). It may
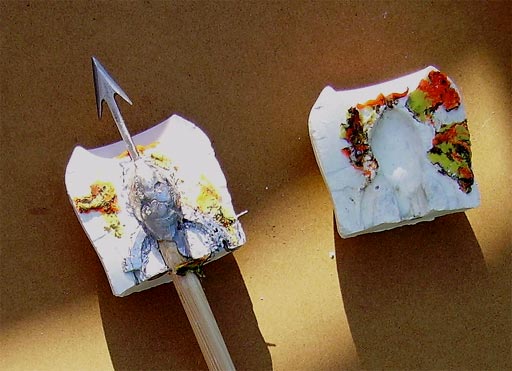
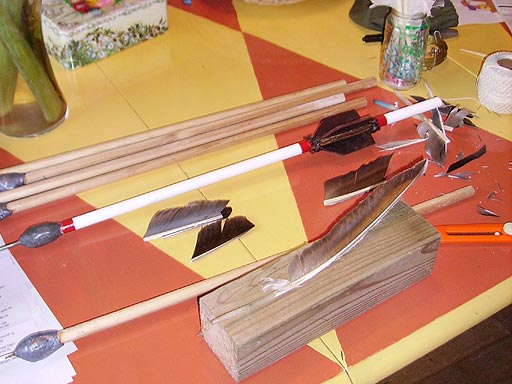
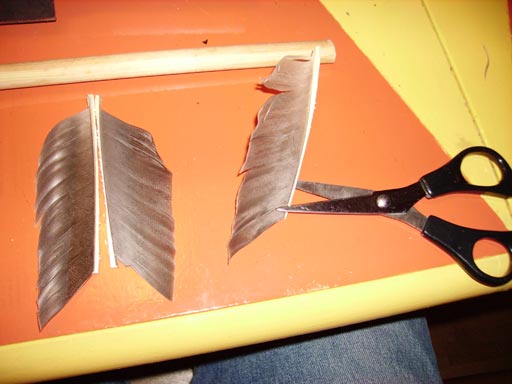
however be very hot for a few minutes! The Tail The only thing needed now is flights for the tail. Without these, the plumbata is not stable and won't be thrown the distances that should be possible. Therefore, we need stabilisers. Although bits of wood can be used, the most durable solution would probably be leather.
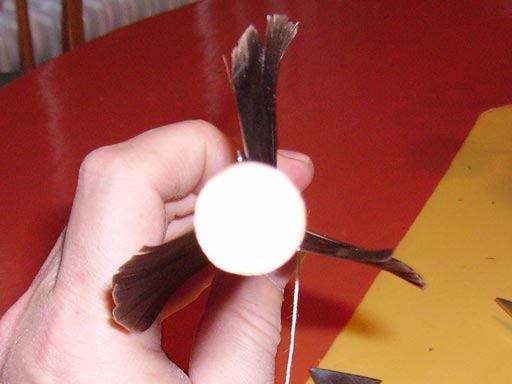
The easiest and cheapest solution would be feathers though. These would be found anywhere and therefore the best solution (for this was probably a mass-produced weapon), although feathers are not as durable as leather. For this you need some large feathers such as from a goose or maybe a swan (sturdy ones), a sharp knife and some string or sinew if you can get it. Cut 3 to 4 fletches per plumbata and cut them to equal length. Then trim about an inch from the front and back of the quill to leave space for the string. For a good result also taper down and thin the front end of the quill.
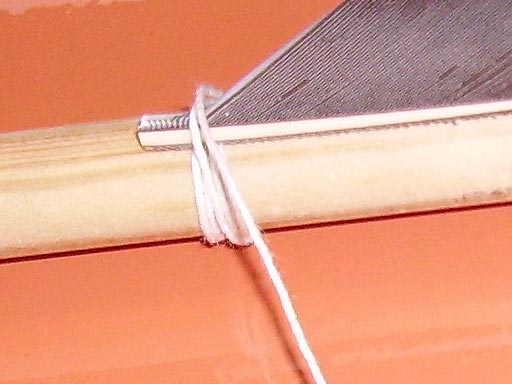
Start with the shortest fletch (you'll trim them later). Remember to to leave about 5-10 cm of shaft behind the fletches, since this is needed to hold the plumbata when throwing it underhand. Wrap the string around the shaft once, then lay the front end of the fletch on top of it and tie the string twice around it. Make sure that the feathers are sticking right up, 90 degrees from the shaft. Then take the second fletch, place it about 120 degrees from the first (or 90 if you use four fletches). Look down the butt end of the shaft to see if you do it right, but you'll be able to move them later - eyeball it until it looks good. Repeat with the third (and fourth) and wrap the remainder of the string around them.
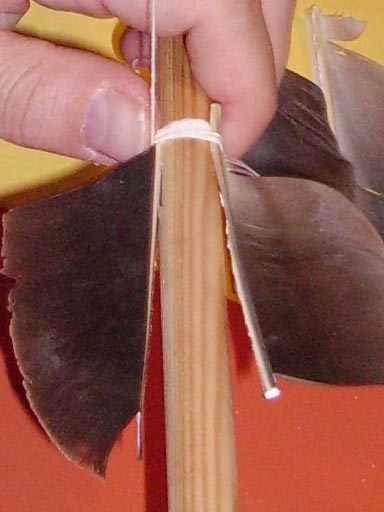
If you want to glue the quill down (I did), this is probably the best time. Repeat the process with the back end of the fletches. Check while drying and if necessary pull the tail end to stretch the quill so it will lay flat on the shaft. If it still won't stay flat, you can (temporarily) tie it down in the middle. When the fletches are secured, trim them down with a sharp pair of large scissors. Don't make them too short or you'll add speed but loose stability. When this is ready, the plumbata is functional. Paint
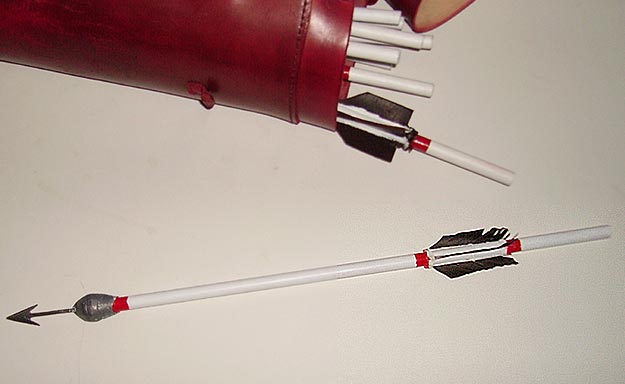
The plumbata is now finished. Have fun with it. It will break soon enough when thrown often.
|
VortigernStudies is copyright © Robert Vermaat 1999-2009. All rights reserved |